- Go to Campaigns menu and select SMS.
- Click the Create campaign
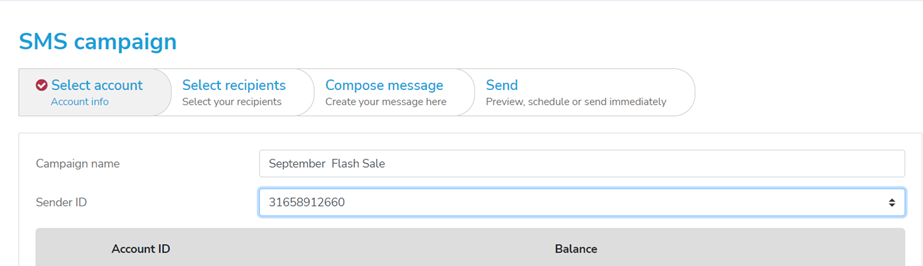
3. Type your campaign name in the Campaign Name textbox (e.g., September Flash Sale).
4. Select your Sender ID for this campaign. In the event you have more than 1 Account ID, please select the right account.
5. Click the Next button to proceed.
6. At the Select recipients section, you will have 3 options to upload subscribers’ information:
i. Temporary list - Upload a temporary list that will not be stored after the campaign.
ii. New list - If you have not stored the list yet in Mobile Communicator, you can click on this option to upload it directly. The list will be stored after the campaign.
iii. Existing lists - Choose the subscriber list which you have already generated with the Lists feature.
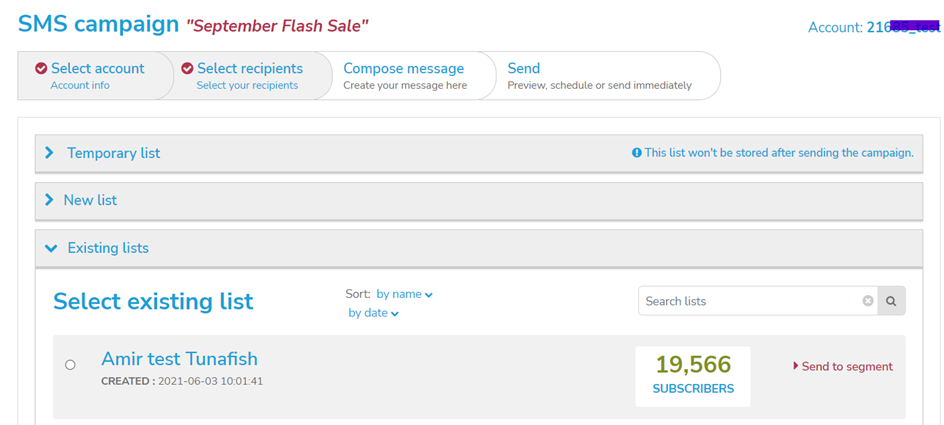
7. Choose your Subscriber List for the campaign.
8. On the right-hand side, you will notice an option for subscriber segmentation, named Send to segment which allows you to send notification to specific subscribers in the list. Click this option if you wish to do segmentation else click the Next button.
9. Type your message content in the textbox provided. You may also select your pre-defined message from the template if you already have one created.
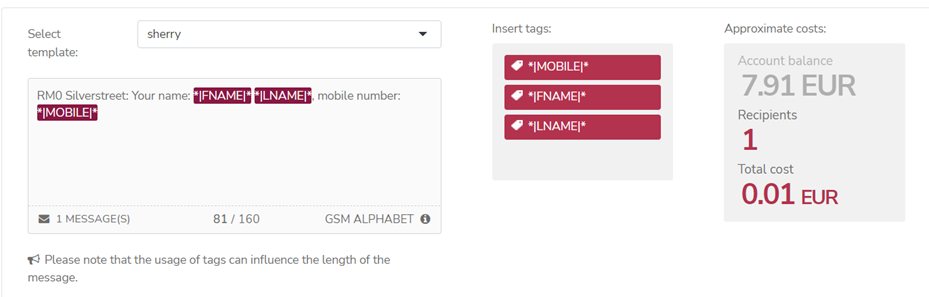
10. If you wish to insert a tag, just click on the available options. That field will be replaced with the value from your subscriber list. Please note that the usage of tags can influence the length of the message.
11. Click the Next button.
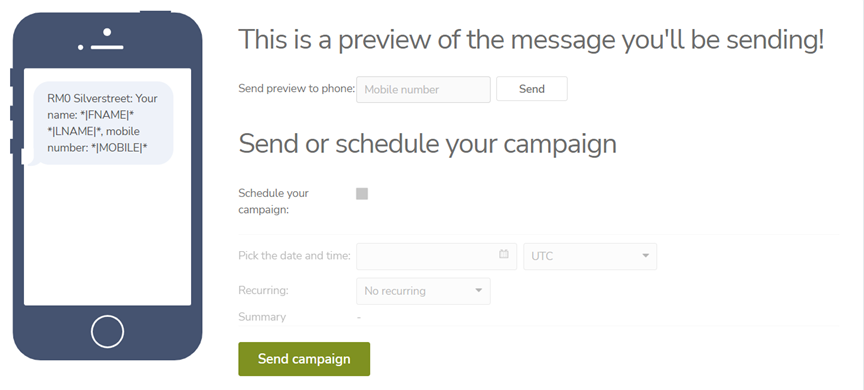
12. You will receive a preview of the message content. If the result is satisfactory, click the Send campaign button else click the Previous to go back for the necessary changes.
13. Alternatively, you may also send the preview to a mobile phone before sending the campaign. To do so, key-in the mobile number and click the Send button. If you are satisfied with the preview, click the Send campaign button else make the necessary changes first.
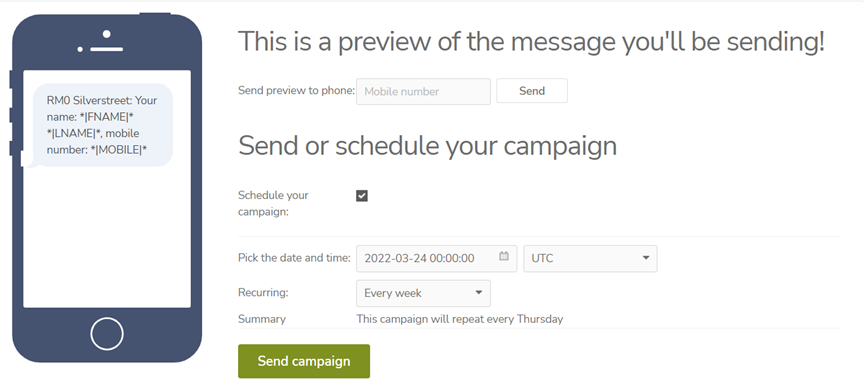
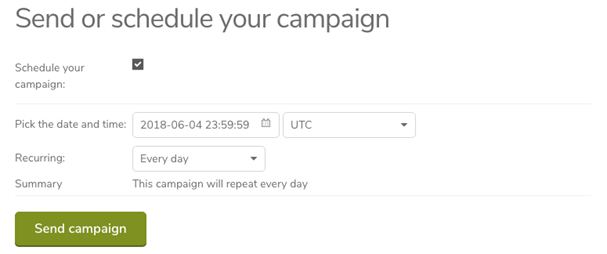
14. You have the option to Schedule your campaign or set Recurring campaign
on a daily, weekly, or monthly basis.
15. If you intend to schedule your campaign or set a recurring campaign on daily,
weekly, or monthly basis, do the following:
• Click on the Date/Time drop-down menu and choose the preferred schedule.
• Click on the Region drop-down menu to choose the Country, which refers to the time zone.
• Select Every day, Every week or Every month in the Recurring field if you want the campaign to be repeated at the scheduled time.
• Click the Schedule your campaign checkbox.
• Click the Send campaign button.
16. Reminder is yet another feature available to you in the Subscriber List by using the combination of data segmentation and recurring campaign. You can then plan accordingly, to send your reminders. If you would like to send a reminder e.g., reminder on membership card expiry, do the following:
• Click the Send to segment expandable link and choose your preferred field. For example, you would like to send out the notification 2 days before the membership card expires.

• Click the Next button once segmentation is completed.
• Type your message content as usual and then click the Next button.
• Click the Schedule your campaign checkbox and set the recurring period as Every day. By setting this up, the system will actively scan your subscriber list daily and send out the reminder to the subscribers 2 days before their membership card expires.
• Click the Send campaign button.
Note: If you have sent a campaign but have insufficient credits, you will receive a mail indicating that one or more messages of your campaign are rejected by the system. Please request for more credit to successfully send your next campaign.
17. The following screenshot shows a Campaign List. The first campaign in the
Campaign List is a scheduled campaign which shows the scheduled date and
time.
The following functions are available under a scheduled campaign:
• Re-schedule
Click to re-schedule your campaign
• Delete
Click to delete the campaign.
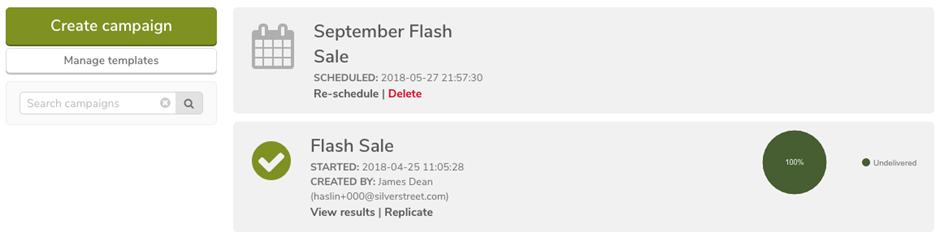
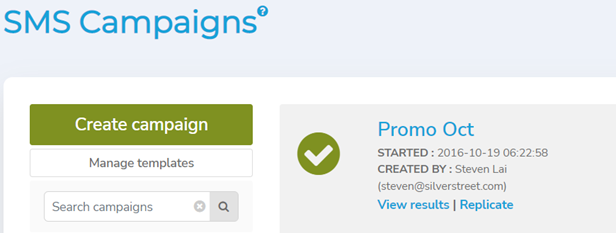
18. The second campaign is an executed campaign, which shows the details of account user (name and email address), the executed percentage and its status (delivered or undelivered).
The following functions are available under an executed campaign:
• View Results
Click to view the message delivery report.
• Replicate
Click to replicate or create a similar campaign.
Comments
0 comments
Article is closed for comments.